
How to Mount Drime as a Local Drive in Windows
July 30, 2026

Mounting Drime as a local drive in Windows is easy with Air Live Drive. The application connects your Drime cloud account to Windows File Explorer, allowing you to open, edit, save, and organize files as if they were stored on a physical hard disk, without synchronizing your entire cloud storage or using unnecessary local disk space.
What Is Drime?
Drime is a cloud storage service for keeping documents, photos, videos, backups, and other files online. It provides a central space to store and access content from different devices with an internet connection.
Although the Drime web interface is useful for basic file access, working from a browser may be less convenient when you use desktop applications or manage large numbers of folders and files. Downloading a file before editing it and uploading it again afterward adds time, creates duplicate copies, and can take up valuable space on your Windows PC.
With Air Live Drive, you can integrate Drime directly into your Windows workflow.
Can You Mount Drime as a Drive in Windows?
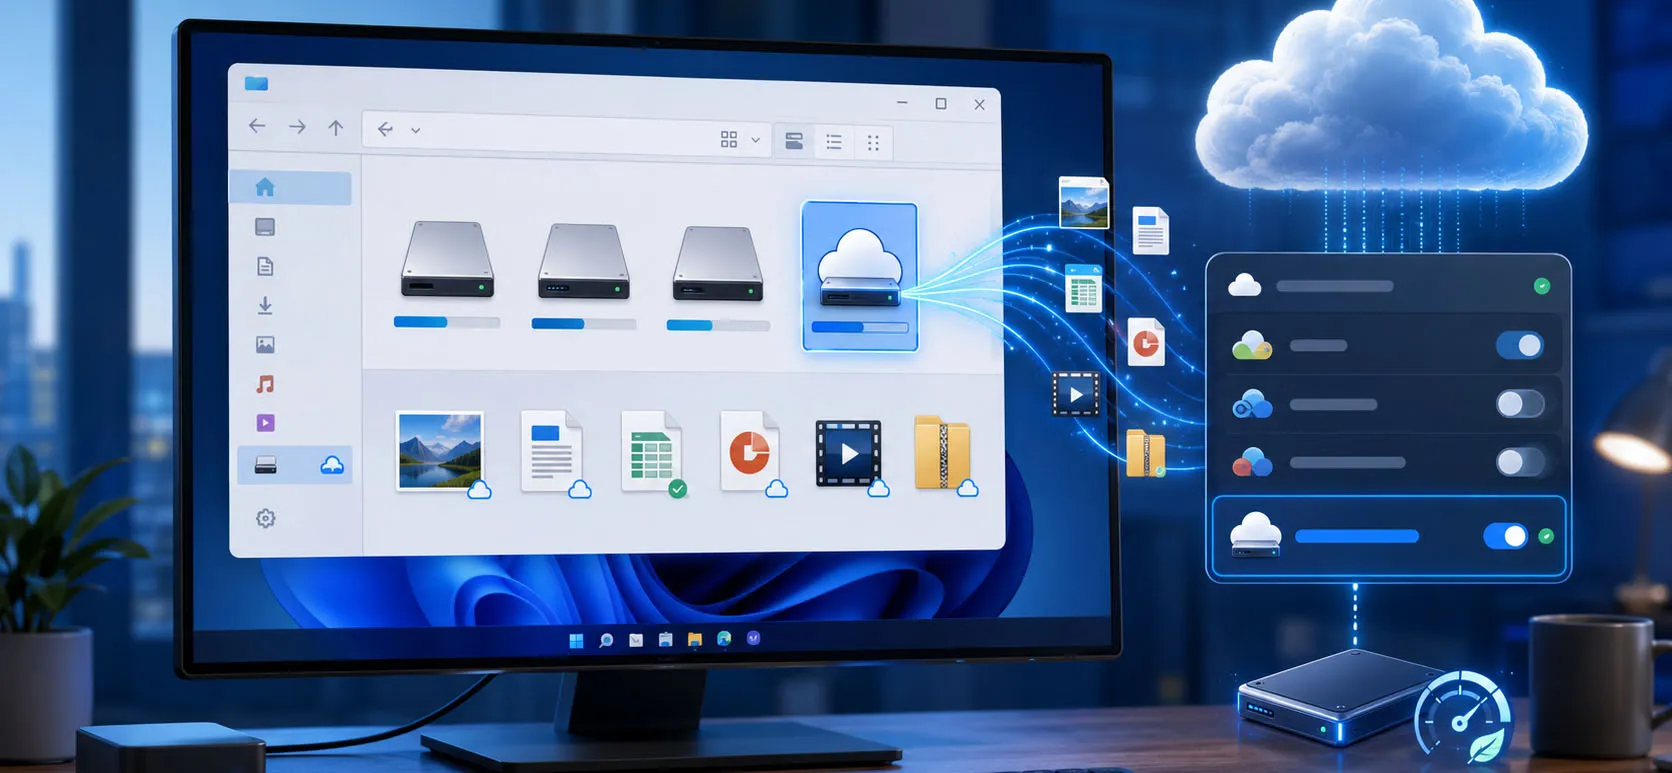
Yes. Air Live Drive lets you mount Drime as a virtual disk drive in Windows. After connecting your account, Drime appears in This PC in Windows File Explorer, alongside your local drives, USB devices, and other connected storage.
You can assign Drime a drive letter, such as D:, H:, or Z:, then browse its folders as you would on any disk. This makes cloud storage easier to use with your existing applications and file-management habits.
Unlike a traditional sync client, Air Live Drive does not require you to download and retain a complete local copy of your Drime files. You access the content you need directly from the mounted cloud drive.
Why Use Air Live Drive for Drime?
Air Live Drive turns Drime into a practical extension of your Windows file system. Instead of switching between a browser and desktop applications, you can work from one familiar location: Windows File Explorer.
Key benefits of mounting Drime with Air Live Drive include:
- Access Drime from File Explorer without opening a browser.
- Open cloud files directly with the applications installed on your PC.
- Edit and save files in Drime from Microsoft Office, LibreOffice, Photoshop, GIMP, and other software.
- Avoid full synchronization, so you do not fill your local SSD or hard drive with duplicate files.
- Copy and move files easily between Drime, local disks, USB drives, network locations, and other mounted clouds.
- Manage folders normally by creating, renaming, deleting, and organizing content from Windows.
- Use multiple cloud accounts in the same Windows environment.
This is particularly helpful for users with limited local storage, large media libraries, project folders, backups, or several cloud services.
How to Add Drime to Air Live Drive
Adding a Drime account to Air Live Drive only takes a few steps.
1. Open Air Live Drive
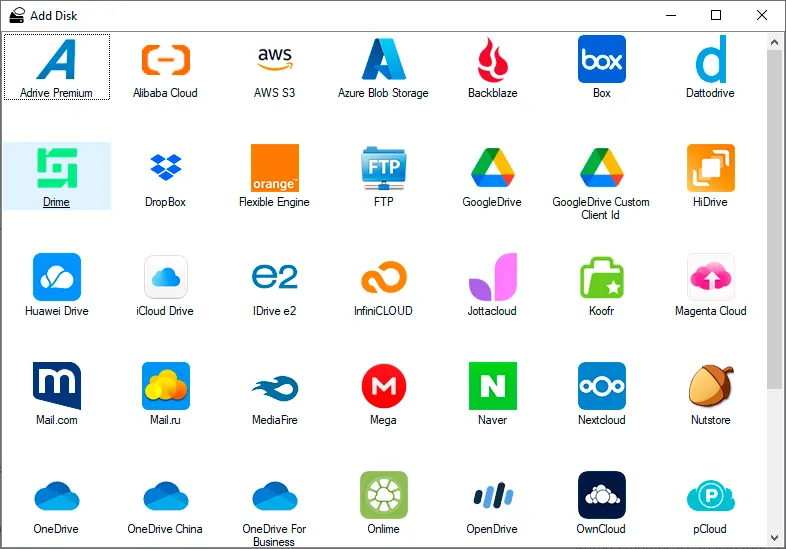
Launch Air Live Drive on your Windows computer. In the main window, select Add Cloud Disk.
Air Live Drive displays a catalogue of supported cloud storage providers.
2. Select Drime
Find and select Drime from the list of available services. Air Live Drive will open the Drime connection window.
3. Enter Your Drime Credentials
Enter the email address and password associated with your Drime account.
If your Drime account uses two-factor authentication, you may need to create and use an API token instead of your standard password. The login window provides a link to the relevant Drime account settings, where you can generate the required token.
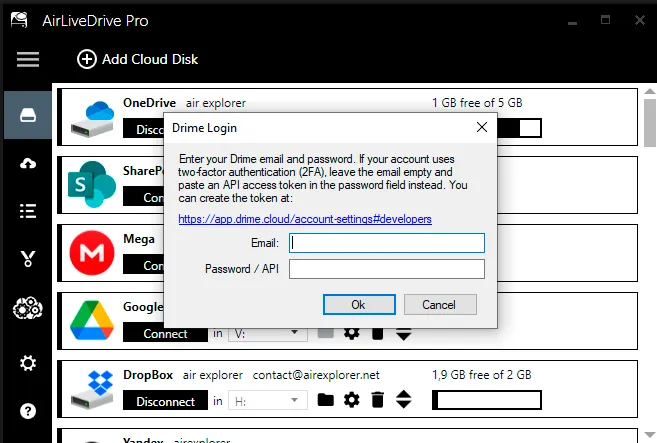
Then click OK to add the account.
4. Assign a Drive Letter
Choose the Windows drive letter you want Air Live Drive to use for Drime. Select an unused letter, for example D:, H:, or Z:.
The selected letter identifies your Drime cloud disk in Windows. You can modify it later in Air Live Drive if you need to reorganize your drive-letter assignments.
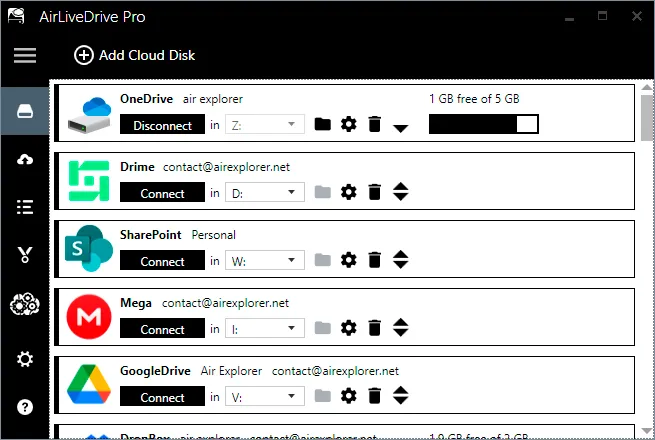
5. Connect the Drime Drive
Once the account is configured, click Connect. Air Live Drive mounts your Drime account as a virtual drive.
The Air Live Drive dashboard shows the connection status, assigned drive letter, and available storage information for the account.
Open Drime in Windows File Explorer
When Drime is connected, open File Explorer and select This PC. Your Drime account appears in the Devices and drives section as a disk drive.
Double-click the drive to view the folders and files stored in your Drime account. You can then work with cloud content through the same interface you already use for local storage.
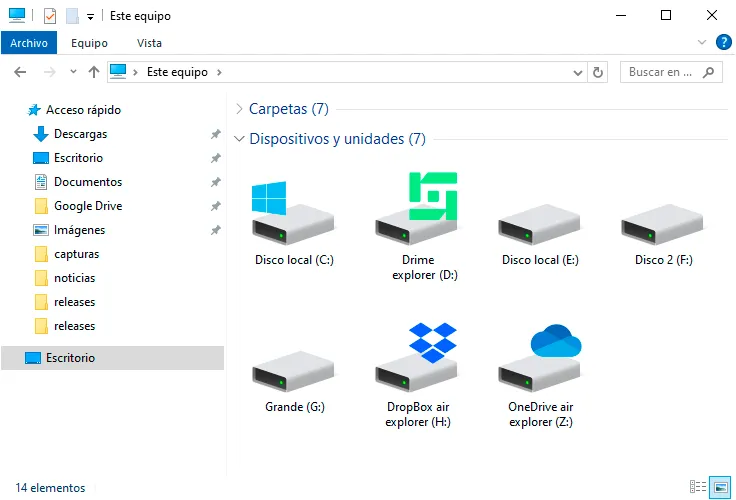
For example, you can drag a folder from your desktop into Drime, copy files from an external drive, or transfer documents from Drime to another mounted cloud account.
Work Directly with Drime Files
Once mounted, Drime works like a regular disk in Windows. You can access files with compatible desktop applications rather than downloading them manually from the browser.
For example, if a Word document is stored in Drime:
- Open File Explorer and enter your Drime drive.
- Double-click the document to open it in Microsoft Word.
- Edit the file as usual.
- Click Save.
Air Live Drive manages the connection between Windows and Drime, so your updated file is saved back to cloud storage.
This workflow also works for many other file types and applications:
- Microsoft Word, Excel, and PowerPoint files.
- PDF documents and office archives.
- Images edited with Adobe Photoshop, GIMP, or similar tools.
- Audio and video files.
- Design resources, project assets, and working folders.
- Backups and long-term archives.
Performance depends on your internet connection, file size, and the way each application handles files. For large media projects, a fast and stable connection is recommended.
Access Drime Without Full Synchronization
A sync-based cloud-storage workflow typically downloads a local copy of your files. That can be useful for offline access, but it also means that a 100 GB folder in the cloud may require another 100 GB, or more, on your computer.
Mounting Drime with Air Live Drive offers a more storage-efficient alternative. Your files remain in Drime, while they are accessible through a drive letter in Windows whenever you need them.
This approach helps you:
- Keep your local drive free for applications and active projects.
- Avoid duplicate copies of cloud files.
- Access large cloud folders without synchronizing everything.
- Reduce manual downloading and uploading.
- Centralize several cloud accounts in Windows File Explorer.
Mount Drime and Work from Windows
Air Live Drive makes it possible to use Drime as a local drive in Windows without changing how you work. Connect your account, choose a drive letter, and access your cloud files from File Explorer just like any other disk.
Whether you manage office documents, media files, backups, or project folders, mounting Drime with Air Live Drive gives you direct cloud access while helping protect your computer’s local storage.
You can check more information here:
-How to Mount Apple iCloud on Windows
-Optimize your workflow: Real-time file management with PikPak
-Infincloud as a Windows drive